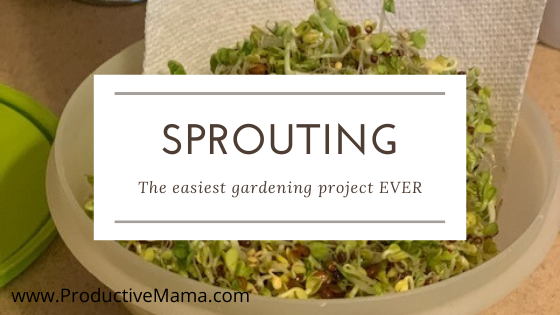
Easy, useful, nutritious indoor gardening in less than one square foot of space? It’s not just a great project to do with your kids, but provides the ultimate in locally grown produce. Whether you are “stuck” at home during a storm or quarantine OR want to avoid eating food shipped hundreds of miles, you can feed yourself fresh greens in a matter of days right on your own countertop. This also makes it perfect for those with limited mobility or apartment dwellers who just cannot garden.
Sprouting is easy and quite fun. Children love to sprout, as they can see results right away and can see the difference a few hours make. Instead of waiting a month to see results outside, they can wake up to see changes in their sprout garden. And children are usually more excited to eat something they’ve grown. Parents will enjoy this activity with their kids (easy, minimal investment, no lights or special equipment, no bugs) and hopefully see the benefits of continuing on a regular basis.
Beyond the fun and learning is the wonderful nutrition. First, because you grow them yourself, you know they are organic. Sprouted greens are the absolute freshest food, providing nutrients and live enzymes to aid in digestion and make food (the sprouts AND your other food) more usable to the body.
Sprouts are also high in fiber and antioxidants. Finally, sprout proponents say that sprouts are baby plants that contain higher percentages of essential proteins, minerals and vitamins. And, at the most fundamental level, they are fresh, green food any time of year. Many people keep some on hand for short term and long term emergencies just for that reason.
Instructions for sprouting seeds can be found in many places online. This won’t be a detailed tutorial. At its most basic, sprouting consists of taking seeds (it’s best to use those sold for sprouting), soaking them, and then rinsing and draining them until they are ready to eat. Yes, it is really THAT simple.
This post may contains affiliate links, which means that if you click on one of the product links, I might benefit in some way. Please feel free to check out the full affiliate statement and disclosure here.
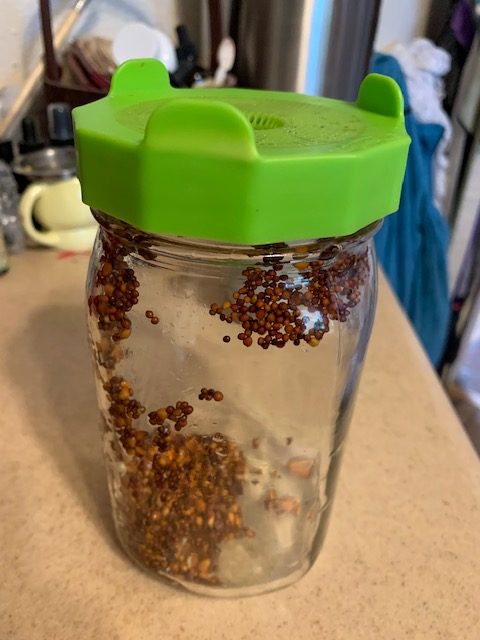
Your local natural grocery store will likely have sprouting tools and seeds near the bulk herbs. You can use mason jars with screens, sprouting trays or lightweight cloth bags. I have used various types but lately have been coming back to the mason jar with a mesh-type lid. The one I currently use is from the folks at Mason Tops.

You can find various seeds or seed mixes to sprout. My personal favorite is radish sprouts, as they have a kick! Another great option is salad blends, sandwich blends, or blends that say “zesty” or “spicy.” That’s what I’m using in my photos.
When you get your first crop:
- add them to sandwiches
- add to salads
- fill tacos
- cover nachos
- make sprout quesadillas (personal fave)
- stir into soups
- juice them
- add to your green smoothie
- make dips or sandwich spreads
- add to eggs
- make sprout wraps and rollups
- top baked potatoes
I basically put them on everything!
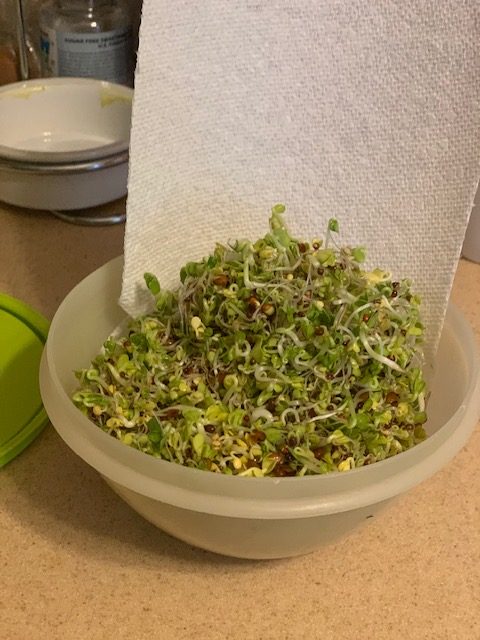
I usually start eating mine from the jar (clean utensils only!) and then store them in a covered container in the refrigerator. I put them between a layer of paper towels to help keep them from getting too damp and spoiling. We typically eat them up before that is an issue, but occasionally I have had a batch start to smell funny and then I toss it. Hopefully by then I have my next batch almost ready.
Get creative and enjoy the bounty of the easiest, smallest, local garden you can grow! I’d love to hear what you come up with.

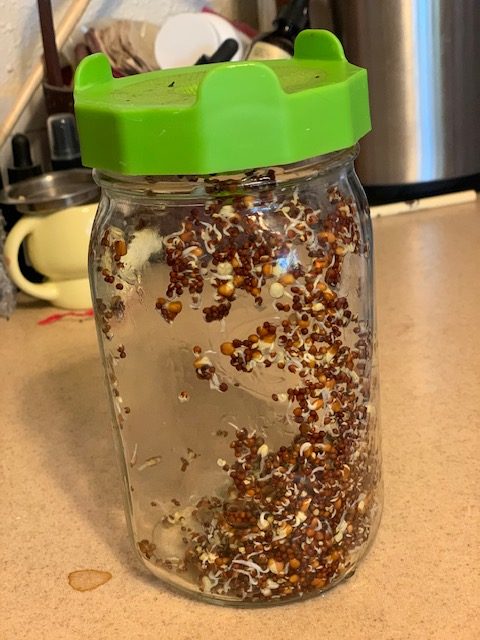
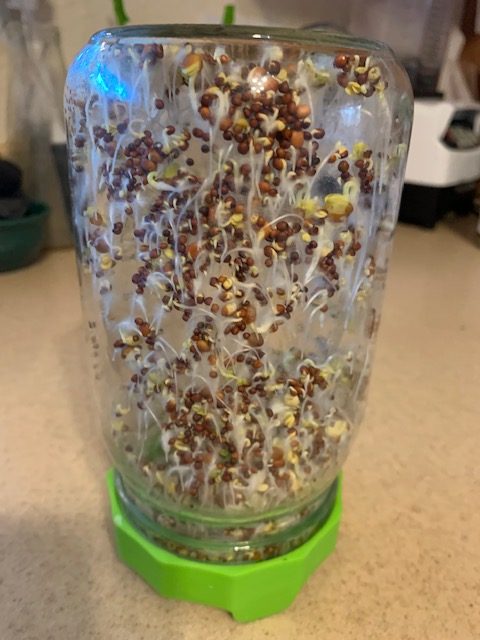
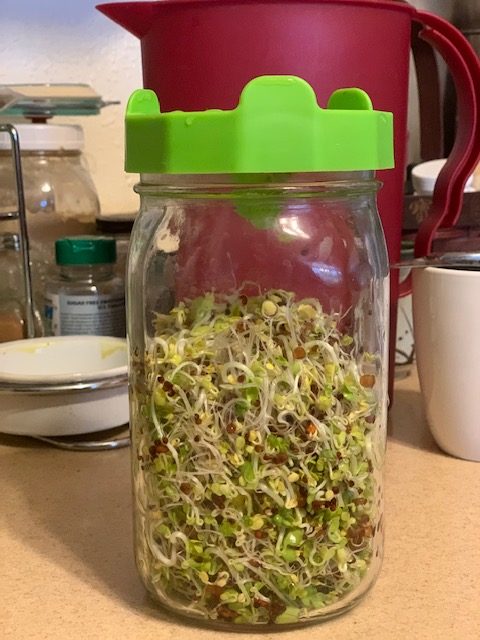
Day 1, after soaking. This is about 2 Tablespoons in a quart jar. Day 3, new growth emerges Day 4 Day 5 Day 6, I’m ready to eat ’em I use paper towels to reduce moisture in storage.